MASALA MANGO MANTRA is a canadian blog uniting artists, designs, decor, fashion, food from around the globe and that which is beautiful and sometimes Indian inspired by design
Showing posts with label decor. Show all posts

Wednesday, September 17, 2014

DIY: Terracotta Jewelry Dish Holder tutorial


A friend's birthday is coming up and I was wondering how to package the gift in a special way. (I plan to give her one of my jewelry pieces) Looking for inspiration, I found this large box of terracotta clay lying in my studio, totally unused!  Sometime last year I had purchased a lot of polymer clay to make some rangoli inspired jewelry.  That got me thinking that perhaps I could do more than just designing jewelry with the unused clay!

So that's when I got thinking and made these terracotta jewelry dish holders.

First things first.
MATERIALS 


❉ Terracotta Polymer clay ( I used Sculpey Oven Bake Terracotta clay) You could use any colour from the range of polymer clays available. I just liked giving mine that earthy touch.
❉ Floral Cookie cutter 
❉ Rolling pin
❉ Wooden block stamps. Any picture rubber  stamp should work as well. I just used what I had at home.
❉ Silcone cupcake liner and a small steel bowl or any oven proof bowl.
❉ Gold sharpie marker
❉ An oven

STEP 1

Roll out the clay on an even surface and place the cookie cutter on it. You can do several at a time if you have several silicone cupcake liners and small oven proof bowls. I will be showing you how I made 2 of these dishes.


STEP 2

Take your stamp of choice and make an impression on clay


STEP 3

Now gently remove the clay from the surface and place one on the back of the cupcake liner like this. Just lightly press on the centre to give it a shape. 
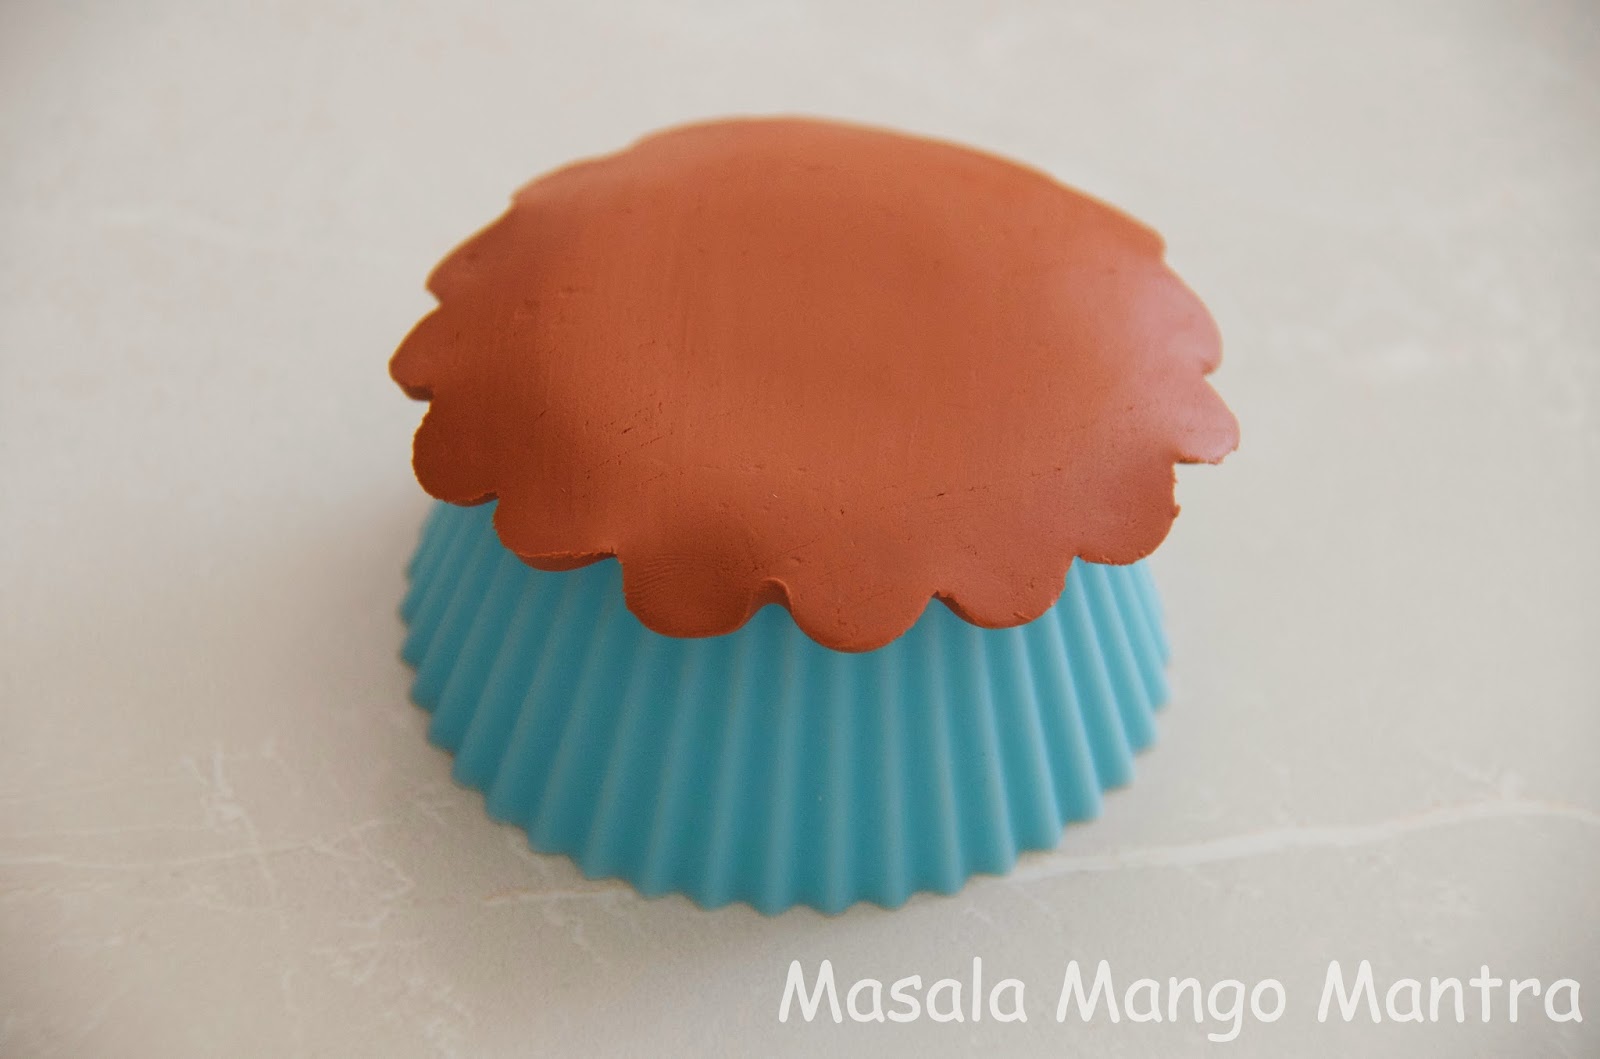
Remove the other impression gently and place on the steel bowl. Now this you can cup it very close to give it the shape of the bowl.


Be very careful in placing the clay on the back. If you don't pay attention and just place however and bake it, this is what you will get! I placed mine on a ramekin and of course was not paying attention to place it on the centre -  so I got a very uneven dish!


STEP 4

Place the cupcake liner and the steel bowl in the oven to bake. Please see the manufacturer's instructions for how long to bake the clay. I had to bake mine at 265 deg F for 15 mins.


STEP 5

Once the dishes are completely cooled, take your gold sharpie pen and use it to color the impressions of the stamp. 

Let the ink dry and you are done!

I love the look of the earthy elegance of terracotta. 

Use your handmade dish for small trinkets, coins and of course jewelry.


I plan to make these with my daughters again as gifts using tea lights for Diwali this year. 


Let me know if you plan to make these. I would love to hear from you.


Friday, May 9, 2014

Fabulous Friday Finds: Sari Stencil Wall Art


I love saris and anything to do with them.  And Deb Trombley of Paint+Pattern has this beautiful tutorial on her blog to make a gorgeous decor in your home. I know I will need oodles of patience for this project but I am so going to make it!  

There are a host of projects you will find on the blog, but I quite like this one.

Have a great Friday and super Weekend!


Image via Paint + Pattern 

Friday, March 28, 2014

Fabulous Friday Finds: Cayenne Love

One of the Pantone colours for Spring 2014 is Cayenne

I haven't tried incorporating this color at home. But seems like a color that I am vacillating towards rather easily.


This is such a gorgeous color for a dress


Image credits:
Mod Cloth
Zoya
Society6
Bluefly

Monday, March 24, 2014

Peacock theme birthday party


On Saturday, we celebrated my daughter M's birthday. Influenced by her mom's love for peacocks M wanted to have a peacock theme party. And of course I jumped to organize it for her and her lovely friends.

Organizing a party with a theme has its pros and cons. The pros are you can stick to a color and look for only specific items. The cons are you can go a bit over the hill and spend....

Anyway since I am into peacocks and very readily had some peacock decor at home, it was kind of a breeze. The only thing daunting was the cake.

I had taken some cake decorating classes and M wanted a peacock feather on it. And since I am so bad in drawing, I really had the jitters.

Anyway, I ended up baking the cake and decorating it. But it took me a good 2 days to come up with this cake.


For starters I had to get that cake drum decorated, so instead of using fondant, I had icing sugar coated on it. That had to rest for a whole day before I set the cake on it. The original plan for the buttercream frosting on the cake was supposed to be teal, but somehow this color came up when I was mixing the colours and voila, it matched with the peacock cut out.  This is a very simple decorated cake, but very stressful for me because its the first time I baked and decorated a birthday cake.  I wanted to make a peacock feather on the face of the cake. That was the original plan, but since this cake was an 8 inch cake and my handwriting is rather large, I decided to just put a paper peacock cutout.  Coincidentally, the colors of the cake matched the peacock cutout.


I had these peacock masks as part of the decor. Was thinking of giving it as part of the giveaway. But didn't have time to make 10 of them.

But in hindsight, I think I should have made more. Perhaps for another party.


I had this beautiful peacock platter and stand at home. I put the peacock platter on an easel so its beauty could be seen by all.

This is what is written on the platter.

Peacock

" Many colors can be seen, 
Mainly Blue with hints of Green,
Particularly colours match my eyes
Feather glistening
What a surprise"


My daughter M loves lockets and wanted me to make her one. So a thought came to my mind to make lockets in peacock colors for all her friends. They look so lovely, I am thinking of getting some at my SHOP in the next month.


Since there had to be one group activity, I decided to get some wooden alphabets for each guest with their initials. Got some stickers, peacock print paper and bright blue glitter glue.
Such a fun activity. And this is what my daughter made. Not a very messy activity. As soon as the girls arrived and we cut the cake, I got them to decorate the alphabets. When it was time to go home, the glue had dried up and they could put them in their goody bags.


I was lucky to get some peacock print bags at the local craft store.


I made these large paper flowers too. I took a picture of each guest with the large teal paper roses. I made these from strong crepe paper. 


Kept the food rather simple. Since kids hardly eat and the excitement is crazy, I had pizza, chips and juice.

One of the games was Pin the tail on the peacock. Since M loves to draw, I got her to draw a peacock and put circles as tails around it. I also got some peacock print cutouts.  Each guest when blindfolded had to place the cutouts on a circle on the paper.  I made a mark on it with the names. The one's closest to a circle or the one who placed the paper circle was declared a winner.


The party ended with M opening up her presents.


Thank you for stopping by and reading...

I will see you again later in the week.

All pictures are taken by Reshma.

Monday, February 24, 2014

Monday Mood Board: Wishing Spring is here sooner


I live on the East Coast side of Canada and its been predicted that this week is going to be a long and cold week. (Like the minus is going to be quite farther away from zero)

Sigh! 

I've been wishing away winter and hoping to just go out and enjoy the outdoors without all the heavy winter wear and swing away like these girls on a swing.

I found these adorable Felt Fairies at Cozy Mil Art. Milena Vileva is the artist. She has magic in her fingers and you will really love her creations. SHOP HERE

Image courtesy: Cozy Mil Art

Friday, February 21, 2014

Fabulous Friday Finds: Coffee Table Settings

I have 2 young daughters and there is no way I can have coffee table setting done at home. You will find toys, library books and other stuff that was not originally meant to be kept there.  Well, I'm going to try and do a re-arrangement of my coffee table today.

Here are a few inspirations for Coffee Table Settings.

I like the look of black and white on this table. Makes a statement with just the use of 2 main colors. Easy to find at home right?


A nice melange of colors and a pop of magenta


I love blues in any shade. And love the idea of the blue vase. Not so much the flowers though.


How I 'd love to do this driftwood setting at home! My mom is an Ikebana teacher and enthusiast. If she were visiting us, I know she would be able to do this for me. Sigh!

via 


Happy Friday!

See you all next week!

Friday, January 31, 2014

Fabulous Friday Finds: Gorgeous Green Inspirations

I am so done with the long winter days. Its finally a bit warmer today, but there's a bit of snow squall for tomorrow. Blah! 

Anyway, I'm all for some gorgeous green inspiration to pump up my  mood.

I love ikat prints and I'm drooling over this bedspread which I found at Cush and Nooks


And this is a beautiful Green Terracotta Vase which you can buy at CB2


And I love this nail paint that I bought recently. Its the Essie Brand of nail paint that's called Pretty Edgy


Friday, January 10, 2014

Fabulous Friday Finds: Radiant Orchid Bedrooms

For 2014 Radiant Orchid is the colour of the year


And looks like you will see some of this lovely colour in my designs at Ahkriti soon.

Found some inspirations here this FRIDAY

Love this almost lace pattern pillows from IKEA


And oh my! I would love to dress up the walls with this fantastic pattern

Amy Butler's Fountain Wallpaper found at Bobby Berk Home 


There's so much out there. 

Sigh!

Have a great FRIDAY!

xoxo


Friday, November 8, 2013

Fabulous Friday Finds: Kantha Quilts


I've been drooling on a lot of Kantha quilts lately and I think its time I got one for myself.

One of my favourites. A beautiful handmade quilt in Queen Size.  Get this beauty at

Indian Home Textile


Image courtesy of Indian Home textile

Friday, October 25, 2013

Fabulous Friday Finds: Peacock Decor

This week, I've been peacock decor hunting. I've already bought peacock feather candles, peacock bags and now this is on my Wish List. And I'm not feeling guilty one bit! Diwali is just knocking and I simply cannot resist these beautiful peacock beauties !

This is one gorgeous peacock that will liven up any room    

1


Isn't this platter to die for?

2


Ah! I cannot wait to light this peacock candle! I bought just one. I think I should have got more~


Find these here 1 2 3 

Friday, April 19, 2013

Fabulous Friday Finds: Lanterns

I've always been fascinated by lanterns and I am so glad that they have made a comeback in our lives.

Well, for the better because you see them everywhere now.

For my next jewelry show, I plan to use lanterns as part of my decor and I will be buying a few to keep with my jewelry.


Image courtesy: Pottery Barn


Monday, March 25, 2013

Monday Mood Board: Lime green

And Hello! And a very Happy Monday to all of you!

 I am in the mood for Lime green


 via


Its HOLI on Wednesday so I think I am going to get festive with this color for sure.

If you haven't got your dress ready, think LIME green


Thinking of an Easter celebration this Sunday with family and I am so gonna try this colour


Well, don't have green chairs, but I certainly have a lime green runner and napkins to match.

Think Green - LIME GREEN!


LinkWithin

Related Posts Plugin for WordPress, Blogger...