

A friend's birthday is coming up and I was wondering how to package the gift in a special way. (I plan to give her one of my jewelry pieces) Looking for inspiration, I found this large box of terracotta clay lying in my studio, totally unused! Sometime last year I had purchased a lot of polymer clay to make some rangoli inspired jewelry. That got me thinking that perhaps I could do more than just designing jewelry with the unused clay!
So that's when I got thinking and made these terracotta jewelry dish holders.
MATERIALS

❉ Terracotta Polymer clay ( I used Sculpey Oven Bake Terracotta clay) You could use any colour from the range of polymer clays available. I just liked giving mine that earthy touch.
❉ Floral Cookie cutter
❉ Rolling pin
❉ Wooden block stamps. Any picture rubber stamp should work as well. I just used what I had at home.
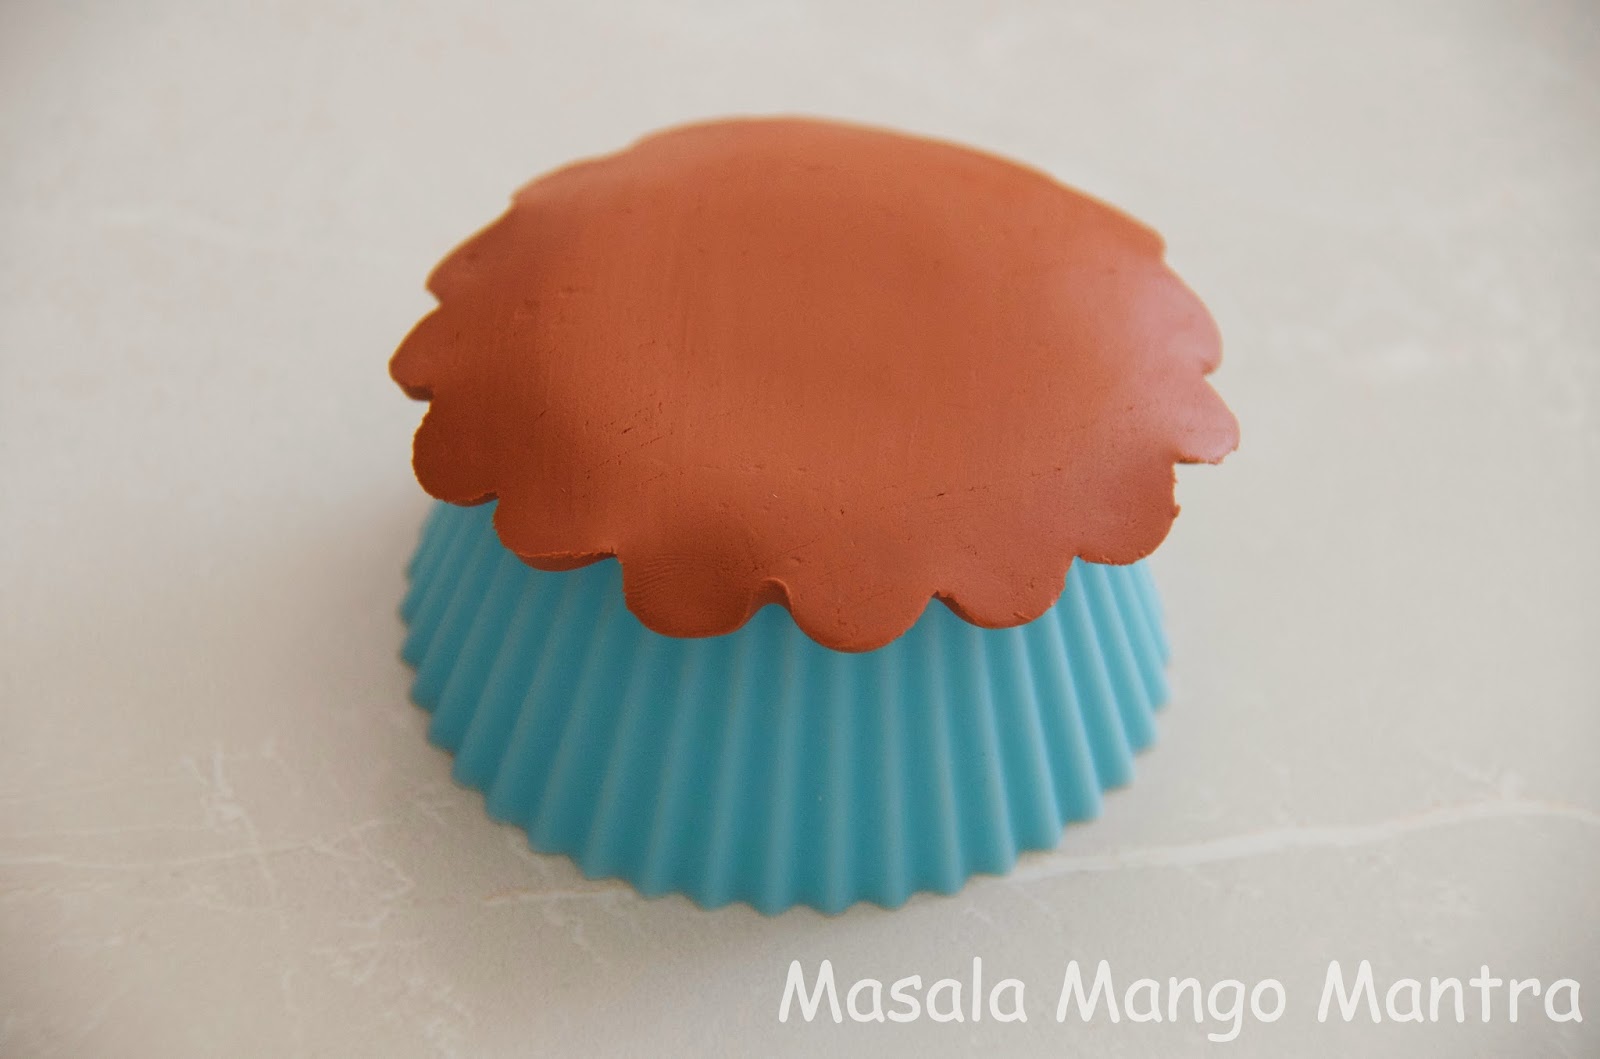
❉ Silcone cupcake liner and a small steel bowl or any oven proof bowl.
❉ Gold sharpie marker
❉ An oven
STEP 1
Roll out the clay on an even surface and place the cookie cutter on it. You can do several at a time if you have several silicone cupcake liners and small oven proof bowls. I will be showing you how I made 2 of these dishes.


STEP 2
Take your stamp of choice and make an impression on clay


STEP 3
Now gently remove the clay from the surface and place one on the back of the cupcake liner like this. Just lightly press on the centre to give it a shape.
Remove the other impression gently and place on the steel bowl. Now this you can cup it very close to give it the shape of the bowl.

Be very careful in placing the clay on the back. If you don't pay attention and just place however and bake it, this is what you will get! I placed mine on a ramekin and of course was not paying attention to place it on the centre - so I got a very uneven dish!

STEP 4
Place the cupcake liner and the steel bowl in the oven to bake. Please see the manufacturer's instructions for how long to bake the clay. I had to bake mine at 265 deg F for 15 mins.
STEP 5
Once the dishes are completely cooled, take your gold sharpie pen and use it to color the impressions of the stamp.
Let the ink dry and you are done!
I love the look of the earthy elegance of terracotta.
Use your handmade dish for small trinkets, coins and of course jewelry.


I plan to make these with my daughters again as gifts using tea lights for Diwali this year.

Let me know if you plan to make these. I would love to hear from you.

These are wonderful, Reshma! I too have a box of that terracotta Sculpey... not suitable for beads but great for these little projects :) Thanks for sharing your tutorial!
ReplyDeleteLove this is tutorial. I will surely try this. Thanks Reshma.
ReplyDelete